Ditch Light Modifications on a a Bowser HO Scale M630

Featured

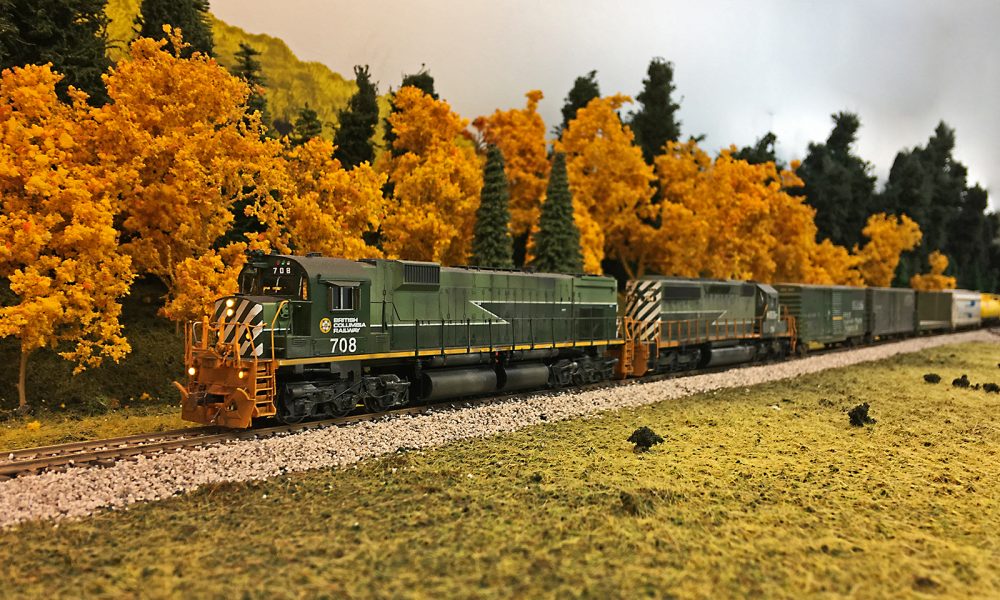
After a wait of four years (!) Bowser Trains has released the HO scale M630 in British Columbia Railway and PGE schemes. Unfortunately The factory made an error in the ditch light housings that was not caught until the model had arrived at Bowser’s office in Pennsylvania.

The pair of ditch lights on the short hood (or nose) on the model came flush mounted, whereas they are recessed into the nose on the prototype. Bowser has since decided to offer a replacement shell program (more info on their website) but I decided to modify the ditch lights on the pair of models I purchased.

Step 1:

Remove the shell from the drive, and carefully remove the front handrail assembly to allow access to the nose. There is a factory PCB board behind the short hood that needs to be slid out of the way. The board is press fit into the nose, so don’t bother removing the small screw that is on the board Drill out the clear plastic lens inserts on both nose ditch lights. Once this is done, place a set of tweezers into the light casing and with a gentle twist remove them from the nose. Set the ditch light castings aside for now.

Removal of factory ditch light housing
Factory ditch lights removed

Step 2:

Using a 5/32 drill bit, carefully and slowly start to drill out the factory holes. I held the bit in my hand and found the plastic to be soft, which made the job easy. Once through, clean up any rough edges with an X Acto knife, and make sure there are no rough spots inside the nose.

Large holes drilled in the nose for the modified ditch lights

Step 3:

Cut a couple of small squares of 0.020 styrene and glue them to the inside of the nose. These will act as a backing plate for the ditch lights. Once the glue has dried get some black paint and paint the inside of the nose to prevent any light bleed from the LED’s

0.020 Styrene added as a backing plate for the ditch lights

Step 4:

Mark the center of each new ditch light hole, and drill a smaller hole using a 3/32″ drill bit, again turning the bit in your hand. Once complete, paint the inside of the recess dark green. I used Scalecoat CNSIG dark green, produced years ago as a special run. You may have to find a green paint that is a close match to the factory Bowser paint.

Small holes for the ditch lights drilled

Step 5:

The factory ditch light castings have a small flange on the backside that will fit into the smaller hole you drilled into the backing plate. Glue the castings in place, and fit the LED PCB board back into place. It should fit with no issues. Be warned that the wiring in the shell is a bit messy, so take care not to pinch any wires when you re assemble the model.

Factory ditch lights installed in the new recesses

Step 6:

Re attached the lighting PCB board to the back of the short hood, add the front handrails and mate the body to the chassis. Test the lights out to ensure they function. I added a couple drops of Testor’s clear glue for lenses in the ditch lights.

Modified ditch lights in action

Now take the models to the weathering bench for maximum realism!

712 and 714 undergo the weathering process, which anyone can do, you don’t need 30 years of “Fine art experience” like some other people to weather a scale model

Starting Over

Once again, I’ve gone far too long between blog updates, but this time I’ve been busier then usual. Five years ago we moved into our current home and I started preparing the basement for my layout. A few short years later the layout was built and operational, and I was looking forward to starting scenery.

As time wore on, several issues in the layout design begun to wear on me, and there were certain elements that I just wasn’t happy with. The design issues caused a drift from my goal of prototypical modelling, and to me the layout had started to become more proto freelanced then I had wanted. Some of the issues I had with the layout were:

Chetwynd Yard: The model ended up looking nothing like the prototype, and was located in a less then ideal area of the basement. Trains running north to Septimus/Fort St. John had to back down a yard track to clear the crossover with the main line, which is something I did not like!

The Helix: I’ve learned over the past few years that a helix is very boring. My design had trains spending far too long inside the helix, which extended the mainline run but was not operationally appealing.

Staging yard: The upper staging yard (Prince George) was built oversized, which ended up reducing the mainline run

Dawson Creek: Although I enjoyed switching Dawson Creek, I soon found the area to be too compressed when I started to plan on building structures.


As you can probably guess, I have decided to rebuild the layout, and have a new, but rough plan drawn out. I estimate at least 90% of the old layout will be demolished, but version 2.0 should be a better design!

I’ve currently removed most of the upper level and the Dawson Creek Sub, and have started to built the “new” Chetwynd yard along one long wall of the basement. The new yard will be almost 100% prototypical when it comes to the trackwork, the only major difference being the absence of the wye.

The helix has been relocated, and will consist of a series of independent loops stacked on top of each other. I’m adding multiple decks to the layout (5 in total including the lower deck) and adding the Mackenzie branch, which includes the mills and pulp mill at Mackenzie.

The Dawson Creek sub will be a little shorter then the first design, with the town of Dawson Creek being relocated to the opposite corner of the basement. I’ll post a rough sketch of the new plan in the future, as well as some construction photos.

Great Moments in Modelling History: The Tumbler Ridge Prototypes GF6C

Here’s a look back into the model railroading history books at a limited run kit that is not that well known.

In 1994/1995 Dave Woodall produced an HO scale kit of the unique to BC Rail GMD built GF6C electric locomotive. Designed to fit on a modified Athearn SD40-2 drive, the one piece Alumilite body shell and assorted detail parts made it possible for BC Rail modellers to finally have a model of the modern coal hauling electrics. Mr. Woodall marketed the kit under the Tumbler Ridge Prototypes banner. I’m not sure how many kits were produced, however they are hard to find, and to date I have only seen one fully built up model.  The only part not included with the kit was the pantographs, which were left up to the modeller to scratchbuild since at the time a matching part was not available commercially.

Let’s take a closer look at the kit, starting with the box which is made from heavy cardstock and is quite durable:

BOX OVERVIEW

The kit I have was purchased from an estate, and has a few extra documents inside:

KIT CONTENTS

Along with the one piece body shell in a vacuum sealed package, there are instructions, and a package with scale sized wire, presumably for the handrails. My kit came with a prototype pamphlet, copies of scale drawings from Model Railroader magazine, Microscale decals, and letters from the Quintette Operating Corperation, the District of Tumbler Ridge, and from Dave Woodall. The model in the rear is an Overland brass import, which was produced many years after the Tumbler Ridge Prototypes kit.

The Quintette Letter:

QUINTETTE LETTER

Tumbler Ridge:

TUMBLER LETTER

And correspondence between Dave Woodall and David Archer, the modeller who initially purchased the kit:

LETTERS

There is also a bill of materials included with the kit:

BILL OF MATERIALS

The shell casting appears to be of good quality, with little to no flash or bubbles that I can see.

Front:

SHELL FRONT

Rear:

SHELL REAR

It’s hard to see in the photo, but there are parts like the underbody detail included with the kit, neatly packaged with the body shell

IMG_1139

The kit I have is untouched since the day it was produced, and will likely stay that way, since for now I have no desire to build it, but it is a neat conversation piece to have in the basement. I think my favorite part of the kit is the letters between Mr. Woodall and Mr. Archer, since they discuss how to build the kit and some of the challenges and limitations with the kit itself. The instructions are brief, but appear to be fairly well written, but they do mention to consult scale drawings when building the kit. I have no idea how successful the production of these kits was for Mr. Woodall, but the fact that there are not many of them out in the market today leads me to believe the venture was not very lucrative!


Starting the Woodchip Gondola Fleet

With the layout operating well, I’ve started to focus on getting the freight car fleet up to snuff. BC Rail had a large fleet of open top woodchip gondolas, many built by the Squamish Shops under the Railwest Manufacturing banner.

Over the years I’ve aquired a few of the Kaslo Shops resin kits for the cars, and I have a bunch more on order whenever they are produced again, The kit went together surprisingly well, with a few extra details like coupler cut levers, grab irons and ExactRail trucks added to the basic kit.

The kit assembled and ready for primer and paint. (those Kadee trucks are incorrect, but I was using them as “shop trucks”

Ready for paint


And now painted and weathered, ready for service on the layout:

BCOL 904446 Complete

I still have to build a load for the car, looking at prototype photos the chips were loaded higher then the interior cross pieces, so the load I build will have to be notched to clear them. I think I’ll build a removable load using some foam insulation board cut to shape and covered with sawdust.

There’s still a long way to go to get a representative fleet of chip cars running on my layout, thankfully the Kaslo kit is quite well designed and fun to build!


TOFC Trailer Project

One of the things I’ve found about building a layout of a specific prototype is you learn a great deal about subjects that may have had little to no interest to you before. On the prototype railway, goods were moved north packed in trailers mounted on flat cars, or TOFC. Before I started my layout, I knew nothing of the different types of trailers that were found on the BCR in the 1980’s, and although I’m still learning, I’ve found there ere quite the variety. I’m not going to get into the different types and sub classes, since I still know very little about them, rather I thought I would write about one trailer I recently completed.

One of the commodities to travel north on BC Rail was the life giving fluid that is beer. For reasons unknown (to me) Labatts shipped beer north in very sharp looking blue trailers with the company logo on the sides.

Here’s a shot taken by Richard Yaremko in August of 1985 that shows one of these trailers:
Prototype AUGUST 1985 RICHARD YAREMKO

No question what was hauled in that trailer!

Through some good fortune and the help of a couple of friends I managed to find a Briggs Models kit of this trailer. Cast in resin with some styrene pieces (ie the roof) it turned out to be a rather nicely designed kit

Kit mostly built before primer and paint:

IMG_0807.JPG

I left the wheels off for ease of painting and weathering of the under frame, the seperate hubs and tires make it nice to paint the pieces before assembly

Tires after paint:
IMG_0824

Body after painting with Polly Scale C&O Blue and lettered using the (very nice) decals that came in the kit:

FullSizeRender


Now painted, weathered and assembled sitting on a TOFC flat that was kitbashed by Andy Barber:

IMG_0833

I added an A Line fuel tank and built the wire hanger contraption (spare tire mount?) to the kit before paint. I’ve always wanted one of these trailers to run on my layout and am happy how it turned out.

Finally, an Update and Some Scenery!

Yes, it has been (once again) too long since my last update, but I do prefer to work on the layout rather then write!

After a few operating sessions both with people and by myself, I essentially took the layout out of service to start scenery on one section. After throwing some plaster around and building a bunch of trees, I’m left with a few scenes:

Extra 708 North departs the siding at Kennedy BC after meeting a southbound freight

kennedy-scene-test-1-january-2017-large

708 North between Tacheeda and Kennedy

bcr-708-north-september-14-1989-kennedy-bc-small

Essentially I scenic a section of the layout between Kennedy and Tacheeda that is roughly 4 feet by 13 feet. Here’s an overview looking north towards Kennedy:

kennedy-tacheeda-scenery-jan-2017

The track curving off to the edge of the layout represents the Tumbler Ridge Line, I will add dummy catenery at a later date, as well as more trees in the foreground.

I’ll cover the scene at Kennedy in a future post, right now I’m ballasting the main into the staging yard at Tacheeda/Prince George


The Bowser SD40-2

Earlier this year, Bowser released one of THE finest HO scale ready to run plastic models I have ever seen; the GMD SD40-2
The good folks at Bowser pulled out all the stops for this model, road specific details, LED lighting, ESU LOK Sound equipped, along with lots of weight for traction!. There were two BC Rail versions released, the factory painted two tone green version, and the later hockey stick scheme. I picked up five units for service on the layout, and I couldn’t leave them clean, so off to the weathering booth!

bcr-754-before-and-after-small

bcr-753-lh-side-small

bcr-753-rh-side-1-small

bcr-764-1-small

bcr-764-2-small

Bowser has announced a second run, this time they are offering BC Rail units painted in the red white and blue scheme. I’ve got a couple on order…..

Ye Olde Dusty Blog

As expected, I’ve neglected updating this blog and spent more time in the basement. Since last update, there really hasn’t been that much progress on the layout per say, however I did finish wiring up the turnout control for the Prince George staging yard. And of course, I have yet to take photos of the panel for said staging yard, maybe I’ll save that for a future update.

I did finish the fascia around the layout, and decided to give it a couple of coats of green paint to seal the hardboard and to give it a (somewhat) finished look. Here’s a shot of the one end of the layout looking towards Kennedy
fullsizerender

The weekend of September 17th 2016 was the annual Greater Edmonton Train Show (GETS) which while small in size, brings several modellers in from out of town. With the suggestion of a friend, I invited several modellers from the province to operate the layout on the Saturday afternoon. We had 6 operators paired into twos running trains on the layout, along with the first use of radios and an RTC. Everything went very well, and the ops seemed to get used to the OCS clearances I had made up. Other then a few minor problems, the layout ran very well.

A week later, the NMRA OPSIG group held their Northern Rails meet in the Edmonton area, with my layout making it’s debut. Again, we had 6 operators (plus one RTC) putting the layout through it’s paces, running 10 trains in 3.5 hours. I was happy every train I had staged ran, something that so far has not happened with our regular crew. It was very safisying to see the op scheme I designed being used, and more importantly, running with no major issues!

I’m currently researching the BC Rail MBS system that was used up until the late 1980’s, I think I will adapt it for future op sessions once I figure out what forms were used in 1989.

Once fall has ended in my area, I plan on spending more time in the basement, with the start of scenery to commence at Kennedy. The diesel fleet conversion from Soundtraxx to LOK Sound continues, with a good portion of the fleet complete. I’ve acquired several of the new Bowser SD40-2’s which will be covered further in a future post.

Locomotive Sound Evolution

For several years now I’ve installed or purchased locomotives with onboard sound, since I feel it adds another level of enjoyment to the hobby. I had long been a user of Soundtraxx Tsunami decoders, until I purchased a Rapido Trains Inc GMD-1 with ESU Loksound.

The ESU sound is like nothing else I have heard. Finally, distinctive prime mover sounds and bell and horn features that sound like the actual components, not something created in a computer. Add in the amazing motor control and the small size of the decoders and I was quickly sold on ESU.

So, now I fac ethe task of removing all the Soundtraxx decoders from the fleet, and replacing them with boards from Loksound. So far, I’ve got 6 models done, with many to follow. For now I’m keeping the ESU equipped units running together and the Tsunami equipped units seperate, to save me the trouble of speed matching everything.

So here’s RS18 #630 undergoing a decoder change out on the bench. I’ve also converting the units to LED lighting.

FullSizeRender

Operational Paper Work

Now that I have the layout up and running, I need a way to prevent operators from crashing each other. The prototype BC Rail used a system called MBS (manual block) which I may adapt for my use in the future. For now, I’ve decided to go with the CP Rail system of OCS Clearance forms.Here’s what I’ve come up with:

BCR OCS CLEARANCE VERSION 3 IMAGE

And for the RTC I took a white board and some pin striping and made a basic layout of all dispatched areas of the layout (crappy cell phone pic)

IMG_1118

The trackage representing the Fort St John Sub will be controlled by the Chetwynd yardmaster, since the modeled length of track from Chetwynd to staging is short. The other evening we had a gathering of regular operators to run through the basics of OCS, since my layout is the first and currently only in our group to have RTC control. There were a few confused faces in the room but I’m confident once we start to use the system in an operational setting most of the group will pick up on it.

I’m still working on the number of trains to run during an op session, currently I have 9 trains staged and ready to go. The trains that can/will run are as follows:

Pinesul Switcher: Runs from Chetwynd south to Pinesul to switch out Petrosul Industries (sulphur traffic). Returns to Chetwynd when finished at Pinesul. Power usually 2 units of any class. Pinesul Switcher may also work any needed industries/trackage on the layout. Example: I currently have the switcher at Dawson Creek with 2 loads of ballast to dump at Groundbirch. After dumping the ballast, the switcher will run south to Chetwynd, lift empties for Pinesul (and spot the ballast hoppers at Chetwynd) and run North to Pinesul.

Dawson Creek Switcher: Runs north from Chetwynd to Dawson Creek, and return. Power 2 to 3 4 axle units (RS-18/M420/C425 units).

Chetwynd-North Vancouver freight. – Runs south from Chetwynd to N Van, may switch Kennedy as required.

PV Peace Vancouver – Runs south from Fort St John to N Van, may switch Kennedy as required.

VP Vancouver Peace – Runs north from N Van to FSJ, may switch Kennedy as required.

N Van Chetwynd Freight – Runs north from N Van to Chetwynd.


One addition to the operating scheme I am adding is freights running north and south out of Fort St John may lift and spot cars at Chetwynd. Example a north bound VP will enter the yard at Chetwynd, set out any cars billed for Chetwynd or Dawson Creek, then run north to FJS (staging) On the flip side, a southbound PV may lift outbound traffic at Chetwynd then carry on south. Since the staging yard and grade at FSJ limit train length to 15 cars, the addition of cars at Chetwynd should create the proper length of trains running south.

A good example is the southbound PV. PV enters the yard at Chetwynd from FJS staging,with 15 cars. The crew will lift 10 outbound cars that came off of the Dawson Creek Sub, creating a 25 car southbound freight. 25 cars is the ideal/max length that my two passing sidings can handle on the railroad.

The reverse happens with the VP. VP enters the yard at Chetwynd heading north, sets out 10 cars (or so) destined for Dawson Creek/Chetwynd, and continues north to FSJ staging with the remaining 15 cars.

Since I use both sides of my Micro Mark car cards, train make up changes on every freight running out of Prince George staging. Some freight smight have traffic for Chetwynd and/or Dawson, or a mix of traffic for Chetwynd, Dawson, or FSJ. The randomness of the car cards creates the need for setting out or lifitng traffic at Chetwynd, which will make the yard a busy place!

The only way to tell if this whole scheme will work is to run it a few times, and next op session (if we have enough people) I plan on using OCS and the set out scheme together. One thing we discovered during a small session last week was the layout can run fine without a Chetwynd yard assignment. However, with more operators, a yardmaster is required to direct the flow of traffic around the yard.